Thursday, October 26, 2006

week 6: 10/20/06

Hello all,
    I promise, I am catching up with my blogging duties. It is now Thursday morning when I officially begin this particular blog posting for last Friday's class, and, it may seem that I am late in posting this, very late indeed. However, because I'm caught up in my other class blogs, I should have tomorrow night's JavaScript class blogged by Monday. I'd say that's an improvement over Thursday of this week, and Friday of last week (a full week after the previous class!). So, if all goes as planned, tomorrow's class is the last one that will be blogged more than two days after the class. My goal is to blog the Friday class on the Saturday or Sunday after it.
    That being said, let's get down to business: creating a bar graph on-the-fly. In this posting, I will continue from the previous posting. Although it was a rather difficult script we wrote last week compared to others we have done so far in class, it was actually the first real and useful application of JavaScript we have seen. We didn't simply learn about a particular statement type or term, such as conditional statements or variables and use them in a couple examples. NO, we actually put to use much of what we have learned so far into an actual script that has real benefit. We didn't just figure out if a number was odd or even, we magically created web-content in the form of an instant and colorful bar graph with little more than a JavaScript script.
    Although I cannot say that things will get any easier from here, I can certainly say that they will not get any more difficult. Because it had so many parts, and because it involved a form, that was one of the more difficult scripts we will contend with during this entire term. Moreover, it has a great many similarities to the form validation that we will start to cover in a couple weeks, and which you will use on your final project. As a result, some of what we did last week, you will see again (and again) in class, and hopefully then it won't be quite as hard as it was the first time.
    oh, and I almost forgot, please take a look at the links I've added to the right: the top section pertains directly to JavaScript and JavaScript related sites which may be of some help to you, and below that are links to other interests of mine (and hopefully yours). If you have any suggestions to make as to links I should add here, please let me know.
    And finally, I want to inform everyone not to miss class tomorrow (Friday, October 27) as I will be assigning the first part of the mid-term project on which we will spend time in class working. See you tomorrow, Carter-


  1. TOPICS:
    • LINK   Reviewing the getElementById() function,
    • LINK   Reviewing event handlers,

  2. HOMEWORK—Using Notepad (or TextEdit with a Mac), please type an .html document with a script that calls a user-defined function which completes the following:
    • That requests a number from the user in a prompt() function or in a form element (as in Friday's class;
    • That utilizes a for() loop that loops the same number of times as the user's number;
    • That repeats an alert() function for each loop with a message inside such as this:
                 Click Here to see example:

     
  3. Review:
    1. document.getElementById()—This is a JavaScript built-in function that selects the specified ID from the HTML code in the body of the document and that enables the script to manipulate it in some way. For example, if there is an ID by the name of "homework", the document.getElementById function may select it in this way:
        document.getElementById("homework").
      As a result, the script will activate the "homework" ID and then have the ability to do things with it or extract data from it. If it is an H1 tag or a H2 tag or a P tag, it may change the color of the text, or the size or various other properties. If it is a form element, it may be able to extract the data from it. It does so in this way:  document.getElementById("homework").value, where value is whatever is typed in the blank of the form element with that ID.
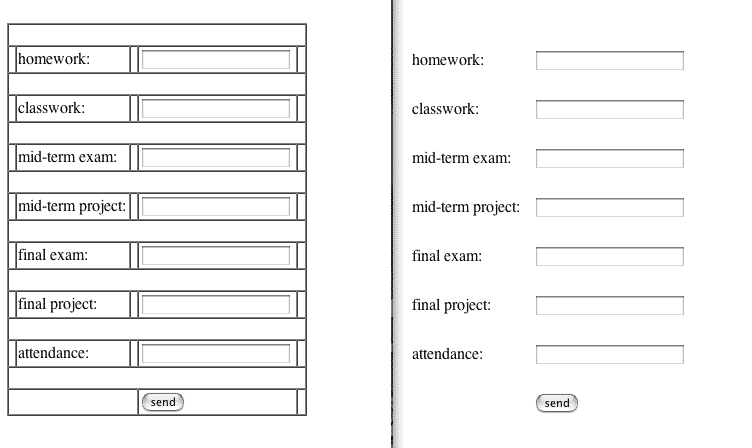
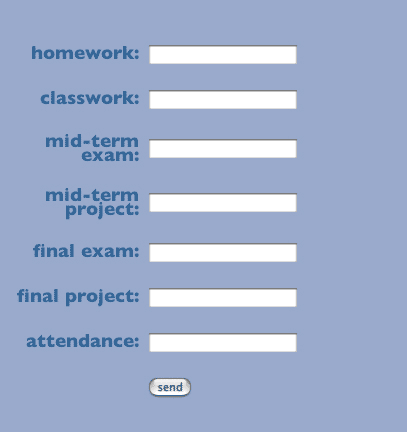
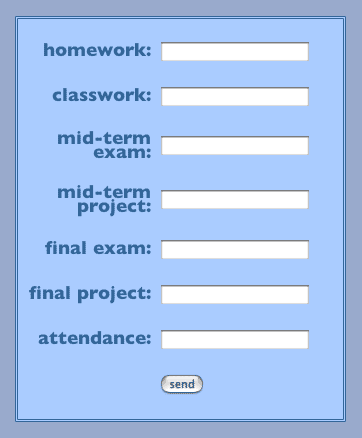
          In the form we typed last week, there were seven (7) form elements. We were able to extract whatever data the user types in those seven blanks with this new function. Below I create seven new variables, and then use the document.getElementById() function to move the data from the form elements into the variables. Finally, all is revealed with a series of alert() functions.

      <script language="javascript" type="text/javascript">
      <!--
      function writeText()
      {
        var homework = document.getElementById("hw").value;
        var classwork = document.getElementById("cw").value;
        var mtExam = document.getElementById("mtE").value;
        var mtProject = document.getElementById("mtP").value;
        var fExam = document.getElementById("fE").value;
        var fProject = document.getElementById("fP").value;
        var quiz = document.getElementById("q").value;

        alert(homework);
        alert(classwork);
        alert(mtExam);
        alert(mtProject);
        alert(fExam);
        alert(fProject);
        alert(quiz);
      }

      //-->
      </script>

       
    2. Event Handlers—In JavaScript there are a series of terms that cause things to happen, much like built-in functions; however, unlike them, event handlers make things occur as a result of certain 'computer events'. These events are peculiar to computers, events such as loading a browser window or web-page, or closing a web-page or browser window, such as clicking with the mouse or moving the cursor with the mouse. These are all events which occur in a computer environment. Event handlers use these events to cause other things to occur, such as making something appear or disappear when you click on a button with a mouse. The click of the mouse is the event that the event handlers handle. The appearance of a pop-down menu when you click on the mouse is the action that the event handlers cause to occur. Some common event handers are: onLoad, onUnload, onmouseOver, onmouseOut, onClick, etc.
          Like the <a> anchor tag, event handlers can be used to call or activate user-defined functions. We can use an event handler to activate our function above with the submit button in our form. We do this in the <input/> tag itself:
      <tr>
        <td colspan="3"> &nbsp;</td>
        <td>
         <input type="button" id="myButton" value="send" onclick="writeText()"/>
        </td>
        <td>&nbsp;</td>
      </tr>


  4. INTRODUCE: Images—As you already know, the document.write() function allows us to write data such as strings and numbers directly into a web-page, and that HTML tags can be included to format a page as any ordinary web-page. Up to now, we have only used text and numbers and formatted them with HTML; however, the <img/> tag is also HTML, so it may also be written into a page. Here is an example:
     document.write("img src = ‘images/ myPicture.jpg’ alt = ‘my picture’/>")
    Whatever the image is, it will now appear in the page if this statement is run in a script. But more can be done: in addition to the src and alt attributes for the <img/> tag are the width and height attributes. Knowing this gives us the opportunity to make the image size customizable depending on numbers input into the script. If we use the form from last week's class which request numbers, grades for each of the input blanks, we can adjust the size of the images with them. If each of the images is set to have the same height, say 10 pixels, but adjustable widths, then depending on the numbers input into the blanks we can change the widths of images.
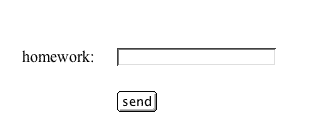
        Type some numbers in the blanks below, then click submit to see how this operates.
     
    grade 1  
     
    grade 2  


    (type values in the blanks above, then click ENTER)

    How this works is not some magical mystery when you understand that everything written into a page such as this is a combination of plain text and HTML. You already know HTML, now all you need to do is find out how JavaScript put it there.

    1. The first step is to use ideas from the bit of script we already have, but instead of using the alert() function, we will use document.write() Further, instead of using seven variables and seven form fields, I will stick to just the two that I have above. Here is a comparison of how we left off in the last posting here, and how we're beginning in this one:

      OLD:

          <script language="javascript" type="text/javascript">
            <!--
            function writeText()
            {
              var grade1 = document.getElementById("g1").value;
              var grade2 = document.getElementById("g2").value;

              alert(grade1);
              alert(grade2);
            }

            //-->
          </script>


      NEW:
          <script language="javascript" type="text/javascript">
            <!--
            function writeText()
            {
              var grade1 = document.getElementById("g1").value;
              var grade2 = document.getElementById("g2").value;

              document.write(grade1);
              document.write(grade2);
            }

            //-->
          </script>


      As you can see, all that has been alterred is that the alert() function has been changed to the document.write() function.

    2. Now that we have done this, we can add the HTML, meaning the images. See the revised document.write() functions below:
        document.write("<img src=‘images/sky.gif’ alt=‘grade one’ height=‘10px’ width=‘10px’/>" + grade1);

        document.write("<img src=‘images/purple.gif’ alt=‘grade one’ height=‘10px’ width=‘10px’/>" + grade1);

      In addition to adding the image, I've used the alt, the src, the width, and the height attributes.
    3. Currently, the width and the height are set values of 10 for each image. They can, nonetheless, be made to vary depending on the values input at the form elements. Remember, the values typed into the form elements are stored in variables of the same names: grade1 and grade2. Those variables can be used as the value of the width attributes.
          Look closely at the example below, especially at the use of double-quotes (" ") and single-quotes (‘ ’).


        document.write("<img src = ‘images/sky.gif’ alt = ‘grade one’ height = ‘10px’ width = ‘" + grade1 + "px’/>" + grade1);

        document.write("<img src = ‘images/purple.gif’ alt = ‘grade two’ height = ‘10px’ width = ‘" + grade2 + "px’/>" + grade2);

      As a result of this revision, the height attribute for both images is set at 10 pixels but the width is set to some value grade1 or grade2. If the user types in 88 or 23, then that will be the new width of the image. Since my images are tiny .gif images created in Photoshop with only 1px in width and only 1px in height, when the width and height attributes of the <img/> tag are adjusted, they can become any size. The advantage is that the file size remains unchanged no matter what size the image become in the HTML document as a result of the script.
    4. If you revisit the function above, you will see that there is one bar for each input box, but that there is also third bar labelled average. Obviously, then, this is the average of the two grades entered into the blanks in the form above.
          To recall elementary school mathematics, to take an average of several numbers is to add up all the numbers and then dvide by how many numbers there are, such as: (A + B + C)/3   or   (A + B + C + D)/4. In the example for the script in this page, there are only two numbers, grade 1 and grade 2. To average them out, we simply add them together and then divide by two: (grade1 + grade2)/2. Therefore, we will revise the script again by adding a third variable with the average of the first two variables as its value:


          <script language="javascript" type="text/javascript">
            <!--
            function writeText()
            {
              var grade1 = document.getElementById("g1").value;
              var grade2 = document.getElementById("g2").value;
              var average = (grade1 + grade2)/2;

              document.write("<img src = ‘images/sky.gif’ alt = ‘grade one’ height = ‘10px’ width = ‘" + grade1 + "px’/>" + grade1);

              document.write("<img src = ‘images/sky.gif’ alt = ‘grade two’ height = ‘10px’ width = ‘" + grade2 + "px’/>" + grade2);

              document.write("<img src = ‘images/purple.gif’ alt = ‘average’ height = ‘10px’ width = ‘" + average + "px’/>" + average + " average");
            }

            //-->
          </script>

      In the above script, we've added a third variable and a third document.write(). However, you'll soon see, that if you run the script, the third document.write() will give you a very large number. This is because when the first two numbers are added together, concatenation is used instead of addition. Therefore, the numbers are put one right after the other instead of creating a sum, and 36 + 78 = 3678 instead of 114. This means that when the user types into the form fields, the data entered is string data even if numbers are used.
    5. To solve this problem, the data entered into the form fields must immediately converted from strings into numerical values. This is done, if you recall, by using the parseInt() function. To use this function, data or a data container is put between the parentheses of the function. One possible solution is as follows:
        var grade1 = document.getElementById("g1").value;
        var temp1 = parseInt(grade1);

        var grade2 = document.getElementById("g2").value;
        var temp2 = parseInt(grade2);


      This would solve the problem; however, it would also require the creation of 2 more variables-- temp1, temp2--and this is a bit repetitive and redundant.
          There is a way, however, to make a more efficient solution: convert the value with parseInt() before it gets put into the first variables, (grade1, grade2). This would eliminate the need for the temp1, temp2 variables.    As it is now,
      first, the value is put in the variable grade1 or grade2; and
      second, the value in the variable is converted by parseInt().
      But it would be much easier if we could parseInt() the value before it is put into the variable grade1 or grade2 instead of after.
    6. This is resolved by examining how we initialize our variables:
      variable       value

      var
       grade2 = document.getElementById("g2").value;

      We see that the value comes from the ID of the form element, and then it is put into the variable with the assignment operator (=). The easiest thing to do to convert the string value to a numerical value, would be simply to put it into the parseInt function like so:

      var grade2 = parseInt(document.getElementById("g2").value );

      Notice that the whole statment -- document.getElementById("g2").value -- is placed between the parentheses of the parseInt() function. That is because that whole thing is what represents the value in the form field.
    7. The next thing we must do is make certain that we prevent anyone from typing anything in the form fields other than numerical values, as non-numbers will get NaN as a return value, Not a Number. To do this we use a conditional (if...else) statment, but we must make sure of two things, that grade1 is a number AND that grade2 is also a number; however, we actually have to ask the question backwards, if it is NOT a number instead of if it IS a number. The distinction is important because we use a special built-in function for it, isNaN(), which asks whether a given value is NOT a number. If the value IS NOT a number, then the function returns true, and so, predictably, if the value IS a number, then the function returns false. This will work well with a conditional statement, which, if you remember, has the following form:
          if(condition)
          { // runs if condition is true
            statement;
            statement; etc.
          }
          else
          { // runs if condition is false
            statement;
            statement; etc.
          }
      Since the condition runs on boolean data, must be either true or false, and since the isNaN() results in boolean data, then we can put the isNaN() function inside the condition, as follows:
          if(isNaN(data value))

      Therefore, if the data value above is not a number then isNaN() will return true. If isNaN() returns true, then the condition will be true and the first part of the if...else statement will be run. If, on the other hand, the data value is a number, then isNaN() will return false, and the condition will be false. This means that the else part of the if..else statement will be run.
          In order for this to work for us properly, we should stop the script from running, or, more specifically, we should stop the document.write() part of the script from running unless the user types in ONLY numbers in the form fields. Since the isNaN() function returns true only if the data is NOT numerical, then the true part of our conditional (if...else) statement should be an alert() telling the user to type in only numbers:

          if(isNaN(document.getElementById("g1").value))
          {
            alert("You must type NUMBERS only")
          }
      and the false part of our conditional statement will contain the document.write()
          else
          {
            document.write("<img src = ‘images/sky.gif’ alt = ‘grade two’ height = ‘10px’ width = ‘" + grade2 + "px’/>" + grade2)
          }

    8. But we must remember that we have TWO conditions: 1) grade1 must be a number; 2) grade 2 must also be a number. Therefore we will have to use the OR operator within the condition as follows:
      if(isNaN(document.getElementById("g1").value) ||isNaN(document.getElementById("g1").value))

      The addition of this operator makes certain that if either one condition or the other is false, then the WHOLE condition of the if() statement is false, and the else statements get run instead. Nearing completion, then, the whole script looks like this:
          <script language="javascript" type="text/javascript">
            <!--
            function writeText()
            {
              var grade1 = parseInt(document.getElementById("g1").value);
              var grade2 = parseInt(document.getElementById("g2").value);
              var average = (grade1 + grade2)/2;

              if(isNaN(document.getElementById("g1").value) || isNaN(document.getElementById("g2").value))
              {
                alert("Please type only NUMBERS!");
              }
              else
              {
                document.write("<img src = ‘images/sky.gif’ alt = ‘grade one’ height = ‘10px’ width = ‘" + grade1 + "px’/>" + grade1);

                document.write("<img src = ‘images/sky.gif’ alt = ‘grade two’ height = ‘10px’ width = ‘" + grade2 + "px’/>" + grade2);

                document.write("<img src = ‘images/purple.gif’ alt = ‘average’ height = ‘10px’ width = ‘" + average + "px’/>" + average + " average");
              }

            //-->
          </script>

    9. Finally, we can concern ourselves with where the script writes the code containing the images. Up until now, we have used the document.writefunction, but there is another way: if you wish to write code and text into the current document instead of a new document, then you have to place it in between a pair of pre-existing HTML tags with its own ID.
          The best candidate for this is a pair of
      <div> </div> tags. These tags are ideal for a few reasons: 1) because they are block-level tags; 2) because they can be used to create layers; 3) because they do little to affect the page by themselves without anything (text or otherwise) between them, which means you can place a pair of <div> </div> tags in a page of HTML code without affecting it much. They can sit there invisibly within the code with their ID waiting to receive directions from a JavaScript to write text or code between them, like so: <div id="graphLayer"> </div>. As you already know, this ID can be called upon using the built-in function, getElementById(). Unlike our previous uses of this function with form elements, we are not asking for its value. Instead, we want to place some code between the tags. Therefore, instead of .value, we place .innerHTML afterwards like so: document.getElementById("graphLayer").innerHTML. Knowing this, all we have to do next is define what it is we want to go between those tags, and as mentioned before, we want to put the code from the three document.write() functions there:
        document.getElementById("graphLayer").innerHTML
      =
      "<img src = ‘images/sky.gif’ alt = ‘grade one’ height = ‘10px’ width = ‘" + grade1 + "px’/>" + grade1 +

      "<br/><img src = ‘images/sky.gif’ alt = ‘grade two’ height = ‘10px’ width = ‘" + grade2 + "px’/>" + grade2 +

      "<br/><img src = ‘images/purple.gif’ alt = ‘average’ height = ‘10px’ width = ‘" + average + "px’/>" + average + " average";


Thursday, October 19, 2006

week 5: 10/13/06

Class, Once again, please forgive me for not posting this earlier. Since I'd only decided to do this blog after week 4 of the term for this class and for all of my other classes, I'm not only trying to keep up with the week-to-week postings, i'm also trying to play catch-up. So please try to bear with me for the next week or so; after which, I should be able to post each class by the Saturday or Sunday immediately following it.

Also, I'd like to apologize for letting class out early last week (although I am sure most of you don't mind leaving school a little earlier than usual on a Friday evening), as well as dashing out so suddenly as I did, even before the rest of you did. Believe it or not, I went to see the premiere of the new film, "Marie Antoinette" at the NY Film Festival. I'm not much of a star-hunter, or celebrity-hound, but it's nonetheless always fun to see famous people. Kirsten Dunst was there, as well as Jason Schwartzman and Sofia Coppola (the director), among others. But shhhh!...it's just our secret.

What you have below is our last class (week 5, Friday, October 13th). We will continue this week with where we left off last weeks' class, so please make sure to bring all your files from last week.

As always, please locate me at school, or email me if you have any questions. See you Friday, Carter-


  1. TOPICS:
    • LINK   Reviewing HTML Forms,
    • LINK   Reviewing some CSS,
    • LINK   Using the getElementById() function,
    • LINK   Event Handlers: 'Calling' or activating a user-defined function with something other than a link,

  2. HOMEWORK—I will check the previous week's homework (shown this week again below), as well as what was due this week:
    1. Last Weeks' Homework: Using Notepad (or TextEdit with a Mac), please type an .html document with a script that creates a user-defined function that does the following:
      • First, requests the user's name;
      • Second, requests a number from the user;
      • Third, requests a 2nd number from the user;
      • Fourth, determines whether the 1st number is greater than, less than, or equal to the 2nd number using conditional statements (IF/ELSE);
      • And then, that finally tells the user (using his/her name) which one it is via an alert() function.
                   Click Here to see example:


    2. This Week's Homework: Using the files that we began with last Friday, please make sure that your script functions up to the point that we brought it by the end of class. Use this week's posting here to help guide you through understanding what we began with, as well as how to begin clearing up any bugs in your script that you might have.


  3. REVIEW: Last semester, in DMA110, you were introduced to XHTML and CSS. Below is a brief review of a few important elements of each:
    1. HTML Forms & Tables—The best-looking, most functional, and clearest FORMS are those that use TABLES for layout purposes. Examine the code below. Notice there are four (4) rows, and that rows 2 and 4 have form elements:

      <form id="myForm">
        <table border="0px" width="100&pct;">
      1  <tr>
            <td colspan="5">&nbsp;</td>
          </tr>
      2   <tr>
            <td>&nbsp;</td>
            <td>homework:</td>
            <td>&nbsp;</td>
            <td>
              <input type="text" id="hw"/>
            </td>
            <td>&nbsp;</td>
          </tr>
      3   <tr>
            <td colspan="5">&nbsp;</td>
          </tr>
      4   <tr>
            <td colspan="3">&nbsp;</td>
            <td>
              <input type="button" id="myButton" value="send" onclick="writeText()"/>
            </td>
          </tr>
        </table>
      </form>
      table1
      Notice that above the four (4) rows of the table and how they organize and lay-out the form. Now, compare to the table below without the borders.

      table2

      You should recognize that the table elements are aligned with each other. Such alignment adds a sense of organization, clarity, and coherence to any design, with only greater effects when using more form elements. In addition, you should also notice that each of the form elements, as well as the form itself, has an ID. These will be important when adding the CSS and JavaScript.
          Using the same basic layout set by the table, seven (7) more form elements may be added:

      table3

       
    2. CSS—The best method to further the design of a form such as this is to use CSS. Since we have begun the layout and design process with the assistance of tables to aid in alignment and organization, CSS can be used to advance our aims to create a pleasing design to a much higher degree of control.
      1. There are many ways to design using CSS. It is very individual and personal the way you proceed, but first I would like to simply set the background color for the page:
        <style type="text/css">
        <!--
          body   {background-color:#99aacc;}
        //-->
        </style>

      2. Next, I want to create a CSS CLASS which, when applied, will design the font and set the text-alignment for certain cells. I will call this class "formLabel":
        <style type="text/css">
          <!--
          body     {background-color:#99aacc;}

        .formLabel {font-family:Gill Sans,
                      Arial, sans serif;
                    font-size:14pt;
                    font-weight:bold;
                    color:#336699;
                    text-align:right;
                    line-height:10pt;}
          //-->
        </style>


        This class should be applied to only the <td> tags which have text, like so:

           <td class="formLabel">homework:</td>

        If applied to all the <td> tags with text (homework, classwork, mid-term exam, mid-term project, final exam, final project, and attendance), then the table will look similar to the image that follows.
        table4

      3. If we next create a layer using an CSS ID, then we can apply it to the table and form below, which will enable us to position it where we like, as well as control many aspects of its appearance.
            But first, let us establish the layer properties: it's width & height, it's position on the page with the top & width & position properties, and it's stacking order with the zIndex property.

        <style type="text/css">
          <!--
          body     {background-color:#99aacc;}

        .formLabel {font-family:Gill Sans,
                      Arial, sans serif;
                    font-size:14pt;
                    font-weight:bold;
                    color:#336699;
                    text-align:right;
                    line-height:10pt;}

        #layerOne {width:300px;
                    height:300px;
                    top:50px;
                    left:200px;
                    position:absolute;
                    zIndex:1;}
          //-->
        </style>

      4. After doing this, you must type a pair of <div> tags around the the <form> tags, and then apply the ID to the first one, like so:

          <div id="layerOne">
          </div>


      5. As a result, the form and table should move down and to the left some. If so, then we may then apply the styling we wish to the layer with border-style, border-width, border-color, and the background-color properties.

        #layerOne {width:325px;
                    height:400px;
                    top:50px;
                    left:200px;
                    position:absolute;
                    zIndex:1;
                    border-style:double;
                    border-width:3px;
                    border-color:#336699;
                    background-color:#aaccff;}
          //-->
        </style>

        All of this produces the following table when saved and refreshed:
        table5


  4. INTRODUCE:
    1. document.getElementById()—This is a JavaScript built-in function that searches throughout an HTML document for an HTML tag with a particular ID. Once located, this function selects the ID which will enable the script to manipulate it in some way. For example, if there is an ID by the name of "homework", the document.getElementById function may select it in this way:
        document.getElementById("homework").
      The script will activate the "homework" ID and thereby will be able to manipulate it. If it is an H1 tag or a H2 tag or a P tag, it may change the color of the text, or the size or various other properties. If it is a form element, it may be able to extract the data from it. It does so in this way:  document.getElementById("homework").value, where value is whatever is typed in the blank of that particular form element.
          In the form we have typed, we have seven (7) form elements. We are able to extract whatever data the user types in those seven blanks with this new function. Below I create seven new variables, and then use the document.getElementById() function to move the data from the form elements into the variables. Finally, all is revealed with a series of alert() functions.

      <script language="javascript" type="text/javascript">
      <!--
      function writeText()
      {
        var red = document.getElementById("hw").value;
        var orange = document.getElementById("cw").value;
        var yellow = document.getElementById("mtE").value;
        var green = document.getElementById("mtP").value;
        var aqua = document.getElementById("fE").value;
        var blue = document.getElementById("fP").value;
        var purple = document.getElementById("att").value;

        alert(red);
        alert(orange);
        alert(yellow);
        alert(green);
        alert(aqua);
        alert(blue);
        alert(purple);
      }

      //-->
      </script>

       
    2. Event Handlers—In JavaScript there are a series of terms that cause things to happen, much like built-in functions; however, unlike them, they make things occur as a result of certain 'computer events'. These events are peculiar to computers, events such as loading a browser window or web-page, or closing a web-page or browser window, such as clicking with the mouse or moving the cursor with the mouse. These are all events which occur in a computer environment. Event handlers use these events to cause other things to occur, such as making something appear or disappear when you click on a button with a mouse. The click of the mouse is the event that the event handlers handle. The appearance of a pop-down menu when you click on the mouse is the action that the event handlers cause to occur. Some common event handers are: onLoad, onUnload, onmouseOver, onmouseOut, onClick, etc.
          Like the <a> anchor tag, event handlers can be used to call or activate user-defined functions. We can use an event handler to activate our function above with the submit button in our form. We do this in the <input/> tag itself:
      <tr>
        <td colspan="3"> &nbsp;</td>
        <td>
         <input type="button" id="myButton" value="send" onclick="writeText()"/>
        </td>
        <td>&nbsp;</td>
      </tr>


Tuesday, October 10, 2006

week 4: 10/06/06

Class, Please forgive me for not posting this earlier. What you have below is only our last class (week 4), but all others will be forthcoming in the very near future. Please email me if you have any questions, or post a comment yourself at the bottom of this posting if you wish to respond to the class or this blog.

See you Friday, Carter-


  1. TOPICS:
    • LINK   Defining: Operations, Operators, Operands,
    • LINK   More on Conditional Operations,
    • LINK   More on User-Defined Functions,
    • LINK   Introducing IF/ELSE Statements (Conditional Statements),
    • LINK   A review of the primary issues discussed in the first three (3) classes,

  2. HOMEWORK: Using Notepad (or TextEdit with a Mac), please type an .html document with a script that creates a user-defined function that does the following:
    • First, requests the user's name;
    • Second, requests a number from the user;
    • Third, requests a 2nd number from the user;
    • Fourth, determines whether the 1st number is greater than, less than, or equal to the 2nd number using conditional statements (IF/ELSE);
    • And then, that finally tells the user (using his/her name) which one it is via an alert() function.
         Click Here to see example below:


  3. REVIEW: During these first three (3) weeks of class, you have been introduced to the three types of data defined by JavaScript:
    1. JavaScript Data Types
      1. Numerical Data—Perhaps the easiest type to recognize as it pertains to something intuitive, that we deal with on a daily basis, number. It includes all numbers, both positive (greater than zero) and negative (less than zero), integers (whole numbers such as 1, 2, 3, -17, 200, etc.), and decimals (1.5, .23, 22.87, etc). Moreover, it also includes numerical expressions; that is, numbers expressed in terms of equations, simple equations such as 1 + 1, more complex equations such as 5 * ((5 + 1) / (25 - 8)), as well as much more complicated mathematical equations that include geometrical, algebraic, and trigonometric functions, and calculus.
      2. String Data—This is also relatively intuitive as the term itself, STRING, refers simply to a 'string of characters' set between quotation marks. Characters here refers to any alpha-numeric character (numbers and letters), both lower and upper case, the hypen, the underscore, as well as all the other characters used in HTML. String data can be common English, such a a word ("hello"), a phrase ("very good food"), or longer strings such as sentences or paragraphs, or even whole 'pages' of HTML.
      3. Boolean Data—This includes simply the values TRUE and FALSE, and their numerical equivalents, 1 and 0.

    2. JavaScript Basic Built-in Functions
        You have also been introduced to some basic built-in JavaScript functions. Remember, a function is a an action that JavaScript takes. The built-in functions we have covered up to now are as follows:
      1. alert()—Perhaps the easiest function to remember, it causes the browser to display a small 'alert' window. It is designed as a ONE-WAY communication of information (data) from the browser or script to the user. It is NOT interactive in that the user cannot respond by sending any information of his/her own.
      2. document.write()—Like the alert(), the document.write() is designed as a ONE-WAY communication of information (data) from the browser or script to the user. It is NOT interactive in that the user cannot respond by sending any information of his/her own; however, it does not produce an alert box. Instead, the information is 'written' directly into the browser window, the page itself, otherwise known as the 'document'. For this reason, the information sent from the script or browser, may also contain HTML or CSS.
      3. prompt()—This function is similar to the alert box in that it produces a small window that pops up above the browser window. Also similar is the fact that some information or data is sent by the script to the user, usually in the form of a request for information. As a result, this function IS in fact interactive in that the user does provide some data of his/her own back to the script, thus affecting the outcome. The type of data the user sends back is restricted only by the request made.
      4. confirm()—This function is also similar to the alert function in that it produces a small window that pops up above the browser window. Furthermore, it is similar to the prompt() function as well in that this function is also interactive. The user here must also provide some data of his/her own back to the script, and likewise affecting the outcome. However, the type of data the user sends back may only be in the form of boolean data as the space provided for responding to the request in the confirm box comes only in the form of 2 buttons, OKAY (true) and CANCEL (false). The request, then, must fit the restraints of this model in that TRUE or FALSE must be satisfactory responses.
        EXAMPLES:

            Good—Click okay if you need more time.
            Bad—What color is your hair?
      5. parseInt()—This function is different than the other four listed above in that it does not necessarily produce any physical changes or results, such as the appearance of a pop-up window, or the change of the appearance of the web-page itself. What it does is perhaps more typical of most JavaScript functions as it works INTERNALLY on the script itself, more specifically, altering the data within the script somehow. The task of this function is to change one type of data into another type of data, from STRING DATA to NUMERICAL DATA. The term 'parseInt' broken down refers to the phrase "Parse the data provided as an Integer", which simply means PROCESS AS A WHOLE NUMBER. The string data is placed between the parentheses, and the function, parseInt(), will therefore convert it from a string to a number, such as:
            parseInt("1001") = 1001 >> converting the string "1001" to the integer 1001.

    3. Variables—A variable in JavaScript is a special item. It serves as a container, like a cup, but which instead of containing liquids and drinks stores a single piece of information, or data. Once created, a variable may contain any piece of data of any type (numerical, string, boolean), but it may only contain one element of data at a time. This piece of data that it stores is known as its value. Moreover, this value may be changed at any time and as many times as required.
          A variable is created, or declared with two things:
      1. var keyword
      2. unique name

      A variable is then given some data to hold, assigned a value, by using the assignment operator   = and then its value. To give a variable some data, to assign it a value, for the first time is called initializing a variable.
      1. declaring a variable —> var myName
      2. initializing a variable —> myName = "Carter"


  4. INTRODUCE:
    1. Operations: An operation consists of two (2) parts, Operators and Operands, demonstrated here with two (2) different kinds of operations:
                    o p e r a t i o n
          5         +         5
        operand 1     operator     operand 2
          6         <         9
                    o p e r a t i o n
      1. Arithmetic Operations—these are numerical expressions by which data is manipulated by a particular operator. Data manipulation here refers to simple exercises such as addition and subtraction. For example, each of the following is a numerical operation:
            10 + 10,
            10 - 10,
            10 * 10,
            10 / 10, and
            10 % 10

        They are numerical operations because they result in a single numerical value.

      2. Comparison Operations—these are not numerical operations in that they do not manipulate numerical data (they do not move or change numbers). The operators here (the symbol in the middle) are not used to produce a sum or a product at the end, resulting in a single piece of numerical data. The result from these is a simple true or false. The script evaluates a comparison between two pieces of data, such as two numbers, and tries to determine if it is true or false: For example, each of the following evaluates a comparison between two numerical values:
            10 < 10,
            10 > 10,
            10 <= 10,
            10 >= 10,
            10 !< 10,
            10 !> 10,
            10 == 10, and
            10 != 10


      3. Concatenation—Technically, this is just one of many different JAVASCRIPT OPERATIONS; however, because of its importance and widespread, ubiquitous usage, I have discussed it since the first class. Furthermore, I believe it deserves review and mention here. Its actual definitions are as follows:
        1. To connect or link in a series or chain.
        2. Computer Science. To arrange (strings of characters) into a chained list.
        Both above are significant to us: it is simply placing one character after another in a chain, or even one chain of characters after another chain of characters. What we are speaking about here then is STRING data. In order for concatenation to occur, there must be string data present, but it may also involve other types of data, as the example below suggests. The two (2) short strings here combined:
            "Hello, " + "how are you?"
        result in the longer string
            —>
        "Hello, how are you"
        Here are some other examples of concatenation:
            "Carter" + "Johnson",
                    —> "CarterJohnson"

            "March" + 11,
        —> "March11"

            "March" + "11",
        —> "March11"

            "March + 11",
        —> "March + 11"

            "March + 11 =" + "March" + "11",
                    —> "March + 11 = March11"

         
      4. Conditional Operations—like comparison operations, these are not numerical operations either in that they do not manipulate numerical data (they do not move or change numbers). However, they are quite different otherswise: they are the ONLY operations that take three (3) operands; but only the first operand is evaluated, and this is based on whether it is TRUE or FALSE. If the first operand evaluates to true, then the second operand is passed as the returned value, and the third is dismissed altogether. However, if the first operand evaluates to false, then the second operand is dismissed, and the third operand is the one that is passed as the returned value. It follows the following form:
                c o n d i t i o n a l   o p e r a t i o n
            (6 < 9) : "Ha Ha!" ; "Hee Hee!";
            operand 1       operand 2       operand 3


    2. User-Defined Functions: There are many built-in functions that make up many of the actions that JavaScript can take. However, a scripter may define her own functions, thereby giving JavaScript new actions to take. Such user-defined functions are actually containers, much like variables; however, unlike variables which hold a single piece of data, a function is a container which hold actions, or rather the code that causes certain actions to occur. A user-defined statement, then, contains JavaScript statements.
          To declare a user-defined function you must type four (4) things:

      1. the function keyword,
      2. a unique name,
      3. a pair of opening and closing parentheses, and
      4. a pair of opening and closing curly brackets.

      Since it has been established that all functions, including user-defined functions, are really containers for code that, when activated, cause JavaScript to take certain actions, it must be made clear where this code goes: it is placed in between the curly brackets. The opening bracket and closing bracket indicate the extents of the code included in the function. Once code is placed between the brackets, it will not be activated unless called upon.

          A function is called by using its name followed by the pair of parentheses. One common way this is done is with a link, where, instead of the URL placed after the HREF attribute, the name of the function is placed there as follows:

              <a href="javascript:myFunctionName()"> click here </a>
      where the name of the function, the function being called, or activated, is myFunctionName().

      Examples—the following are some examples worked out in class of scripts using conditional operations:

      1. positive/negative number: LINK
        <script language="javascript" type="text/javascript">

         function posNegFun()
          {
           var userNum = parseInt(prompt("Please type a number in the blank below.","");

           var temp = (userNum < 0)? "NEGATIVE" : "POSITIVE" ;

           alert("Your number, " +userNum+ ", is " +temp);
          }

        </script >


      2. okay/cancel button: LINK
        <script language="javascript" type="text/javascript">

         function confirmFun()
          {
           var confirmVar = confirm("Please click one of the buttons below, OKAY or CANCEL.");

           var temp = (confirmVar)? "OKAY" : "CANCEL" ;

           alert("You clicked the " +temp+ " button");
          }

        </script >


      3. odd/even number: LINK
        <script language="javascript" type="text/javascript">

         function oddEvenFun()
          {
           var userNum = parseInt(prompt("Please type a number in the blank below.","");

           var temp = (userNum % 2)? "ODD" : "EVEN" ;

           alert("Your number, " +userNum+ ", is " +temp);
          }

        </script >


    3. Conditional (IF/ELSE) Statements: If...else statements are known as CONDITIONAL statements because they rely on a condition before selected code is executed. For example, on the condition that the user clicks okay in a confirm() function, some code may be executed. The first part of the statement always begins with the IF keyword followed by the condition set between parentheses:
          if (100 >10)
      If the condition, set between the parentheses above, evaluates to TRUE, then some selected code is executed. Since 100 is in fact greater than 10, then the condition would evaluate to true. As such, whatever code below the condition set between curly brackets will be executed. Otherwise, if the condition does not evaluate to true, if it evaluates to FALSE instead, then the code between the curly brackets is NOT executed:
        if (100 >10)
        {
          alert("The condition is TRUE!");
        };

      If the condition between the parentheses evaluates to true (which in this case it would), then the code between the curly brackets (the alert() function) would be executed. But if the condition does not evaluate to true, then the alert would not be executed. In that case, a second part could be added to take into consideration the possibility that the condition could return FALSE. If so, then another set of code could be executed if there is an else following it as such:
        if (100 >10)
        {
          alert("The condition is TRUE!");
        }
        else
        {
          alert("The condition is FALSE!");
        };

      If there is more than one condition to test for, then you must add an additional IF statement for each condition that the code must test for:
        if (userNumber >10)
        {
          alert("The number is GREATER than 10!");
        }
        else if (userNumber <10)
        {
          alert("The number is LESS than 10!");
        }
        else
        {
          alert("The number is EQUAL to 10!");
        };


      if/else...if statements: LINK

      There need only be 2 test conditions (and therefore only 2 IF statements) because if the user's number is not greater than 10, and if it is not less then 10, then the only other possibility is that it is equal to 10. There doesn't need to be a condition to test for this possibility.